- Welcome to AHXproject.
AHXproject
< | >
Recent posts
#1
Ubuntu Blog / Creating a private 5G network
Last post by tim - Sep 28, 2026, 06:24 PMCreating a private 5G network
Private 5G networks are dedicated cellular systems delivering ultra-reliable low-latency communication, massive IoT connectivity, and customized security for enterprises undergoing digital transformation. Private 5G subsumes advantages of both public and non-public networks, offering unified connectivity, optimized services, and customized security within a defined area. Private 5G empowers enterprises to control and secure their own information, optimize networks for exclusive requirements, and flexibly reconfigure infrastructure as business objectives evolve.
Private 5G has evolved from an experimental concept into critical industrial infrastructure. The success of private 5G hinges on a fundamental architectural shift: replacing heavyweight, legacy virtualization stacks with agile, softwarized infrastructure that slashes operational expenditure (OpEx) and accelerates service delivery.
However, deploying private 5G at the edge introduces additional challenges. The edge is constrained by power, cooling, space, and it is physically vulnerable. And, increasingly, the edge needs to meet high localized AI processing demands. Solving these challenges requires a cohesive software stack spanning from the immutable Operating System (OS) up to model-driven automation, capable of bridging the gaps between telco requirements and cloud-native IT.
The virtualization dilemma
Historically, deploying a mobile core required racks of servers, substantial power consumption, and heavyweight virtualization stacks like traditional OpenStack. In contrast, private 5G scenarios, where the infrastructure might live in a factory closet or an outdoor enclosure, require lightweight virtualization instead. The user plane function (UPF) of the 5G core, and often the virtualized radio access networks (vRAN) and/or open RAN (O-RAN) components, need to run on a fraction of the footprint.
For years, the industry narrative faced a binary choice: either stick with traditional, resource-heavy virtual machines (often managed by enterprise hypervisors), or move entirely to application containers (managed by Kubernetes). At the enterprise edge, neither extreme is perfect on its own. Legacy hypervisors consume too much compute overhead, inflating OpEx and hardware costs. Conversely, although modern 5G Core and vRAN components are shifting to cloud-native network functions (CNFs) that demand near-bare metal performance, many enterprises still rely on legacy virtual network functions (VNFs) or security appliances that require strict kernel-level isolation.
As a consequence, the industry is increasingly embracing lightweight, hybrid edge virtualization. Architectures built on system containers deliver similar packet performance to bare metal for 5G UPFs while using lean KVM virtual machines (VMs) only when strict kernel boundaries are mandated. This hybrid footprint keeps edge compute efficient, low-touch, and cost-effective.
This is where MicroCloud changes the game for private 5G.
MicroCloud is a low-touch, automated private cloud designed specifically for the edge. Instead of deploying a massive, bloated cloud infrastructure, MicroCloud combines lightweightLXD system containers and virtual machines, distributed storage via MicroCeph , and software-defined networking via MicroOVN into a single automated tool. MicroCloud allows you to deploy a lightweight cluster that can run on as few as three to four physical nodes with 32 GB of RAM each for production high availability deployments.
The OS at the core: determinism, hardware acceleration, and immutability
In private 5G deployments, the OS is the foundational layer through which the network stack accesses compute, networking, scheduling, and hardware acceleration capabilities. For latency-sensitive workloads, a real-time kernel such as real-time Ubuntu , which incorporates PREEMPT_RT, can make task execution more predictable by reducing scheduling latency and providing more deterministic response times. High-throughput UPF workloads, meanwhile, can use technologies such as Data Plane Development Kit (DPDK) for efficient userspace packet processing, while Extended Berkeley Packet Filter (eBPF) and Express Data Path (XDP) provide programmable, high-performance processing within the Linux networking stack.
As private 5G architectures increasingly converge radio processing, edge computing, and AI inference, the OS must expose the hardware primitives needed to allow diverse workloads to share infrastructure predictably and securely. Non-Uniform Memory Access (NUMA) awareness, hugepages, CPU affinity and isolation, device passthrough and Single Root Input/Output Virtualization (SR-IOV) can enable network functions and AI workloads to approach bare metal performance while maintaining resource boundaries through the virtualization and container stack.
Where the threat model requires protection from a potentially compromised host or hypervisor, confidential computing technologies can add hardware-assisted isolation for workloads. The OS therefore needs to provide not just hardware abstraction, but the mechanisms through which higher-level platforms can translate application requirements (e.g., latency, throughput, isolation, and locality) into enforceable resource policies.
Security and lifecycle management are equally important at the physically distributed edge. An OS for private 5G should establish a chain of trust from boot through runtime, combining secure boot, hardware-rooted trust, disk encryption, application confinement, and least-privilege controls with transactional software updates and reliable rollback. Ubuntu Core is an example of this security and lifecycle model, with application confinement, full-disk encryption (FDE), and transactional updates designed for devices that may operate remotely for long periods.
For larger private 5G deployments, vulnerability remediation must also minimize operational disruption. Linux Kernel Livepatch can address supported critical and high-severity kernel vulnerabilities without rebooting, reducing maintenance downtime as a result. In addition to this, Ubuntu Pro provides 10 years of security coverage, which can be extended to 15 years with the Legacy add-on. These capabilities are particularly valuable in environments where infrastructure is expected to remain security-maintained, predictable, and supportable for many years.
Edge AI inference in private 5G deployments
Private 5G networks can generate substantial uplink traffic, such as telemetry, video feeds, sensor data, and more. Sending all raw data to a centralized cloud can increase backhaul requirements, latency, and data and security exposure. Localizing AI inference at the edge can enable very low and more predictable end-to-end latency by keeping data close to where it is generated. A local 5G UPF can provide a direct user-plane path into an edge computing environment, allowing applications such as computer vision, defect detection, autonomous mobile robot trajectory planning, or
In emerging AI-RAN architectures, this convergence can extend to sharing accelerated compute infrastructure between RAN functions and AI workloads. GPUs and other accelerators can potentially support both radio processing and enterprise AI, with spare capacity made available to additional workloads when RAN demand permits. Industry demonstrations have already shown RAN and AI workloads running concurrently on shared GPU-accelerated platforms.
To integrate AI efficiently, the infrastructure must support containerized workloads seamlessly alongside network functions.Ubuntu Server provides the OS foundation for Private 5G and edge AI, with hardware enablement, security maintenance, and long-term enterprise support. For appliance-style edge deployments, Ubuntu Core offers a more minimal, immutable, and transactional model with secure boot, application confinement, and Over-the-Air (OTA) updates. MicroCloud can add lightweight infrastructure virtualization through LXD containers and VMs, while Canonical Kubernetes provides orchestration for cloud-native 5G Core and AI workloads.
This stack enables enterprises to run private 5G alongside edge AI workloads such as computer vision and robotics, while maintaining the performance, security, isolation, and lifecycle management required for industrial environments.
Conclusion
Private 5G can become more than a dedicated connectivity layer: it can provide the connectivity foundation for distributed vertical computing and AI. The strongest architectures will combine trusted OS foundations, efficient infrastructure virtualization, and cloud-native orchestration, so that compute resources can support both network functions and emerging workloads such as computer vision, robotics, and industrial AI. The objective should be to create an infrastructure platform that can evolve as radio, networking, compute, and AI requirements change, while retaining consistent security and lifecycle management across the estate.
Next steps
Learn how Canonical solutions provide a stable, validated, and open foundation for telco workloads.
As private 5G evolves from experimentation into production readiness, its success hinges on a fundamental architectural shift: replacing heavyweight, legacy virtualization stacks with agile, softwarized infrastructure that reduces operational expenditure (OpEx) and accelerates service delivery.
Categories: 5G private network architecture, Private 5G networks
Source: https://ubuntu.com//blog/creating-a-private-5g-network Sep 28, 2026, 05:13 PM
Private 5G networks are dedicated cellular systems delivering ultra-reliable low-latency communication, massive IoT connectivity, and customized security for enterprises undergoing digital transformation. Private 5G subsumes advantages of both public and non-public networks, offering unified connectivity, optimized services, and customized security within a defined area. Private 5G empowers enterprises to control and secure their own information, optimize networks for exclusive requirements, and flexibly reconfigure infrastructure as business objectives evolve.
Private 5G has evolved from an experimental concept into critical industrial infrastructure. The success of private 5G hinges on a fundamental architectural shift: replacing heavyweight, legacy virtualization stacks with agile, softwarized infrastructure that slashes operational expenditure (OpEx) and accelerates service delivery.
However, deploying private 5G at the edge introduces additional challenges. The edge is constrained by power, cooling, space, and it is physically vulnerable. And, increasingly, the edge needs to meet high localized AI processing demands. Solving these challenges requires a cohesive software stack spanning from the immutable Operating System (OS) up to model-driven automation, capable of bridging the gaps between telco requirements and cloud-native IT.
The virtualization dilemma
Historically, deploying a mobile core required racks of servers, substantial power consumption, and heavyweight virtualization stacks like traditional OpenStack. In contrast, private 5G scenarios, where the infrastructure might live in a factory closet or an outdoor enclosure, require lightweight virtualization instead. The user plane function (UPF) of the 5G core, and often the virtualized radio access networks (vRAN) and/or open RAN (O-RAN) components, need to run on a fraction of the footprint.
For years, the industry narrative faced a binary choice: either stick with traditional, resource-heavy virtual machines (often managed by enterprise hypervisors), or move entirely to application containers (managed by Kubernetes). At the enterprise edge, neither extreme is perfect on its own. Legacy hypervisors consume too much compute overhead, inflating OpEx and hardware costs. Conversely, although modern 5G Core and vRAN components are shifting to cloud-native network functions (CNFs) that demand near-bare metal performance, many enterprises still rely on legacy virtual network functions (VNFs) or security appliances that require strict kernel-level isolation.
As a consequence, the industry is increasingly embracing lightweight, hybrid edge virtualization. Architectures built on system containers deliver similar packet performance to bare metal for 5G UPFs while using lean KVM virtual machines (VMs) only when strict kernel boundaries are mandated. This hybrid footprint keeps edge compute efficient, low-touch, and cost-effective.
This is where MicroCloud changes the game for private 5G.
MicroCloud is a low-touch, automated private cloud designed specifically for the edge. Instead of deploying a massive, bloated cloud infrastructure, MicroCloud combines lightweightLXD system containers and virtual machines, distributed storage via MicroCeph , and software-defined networking via MicroOVN into a single automated tool. MicroCloud allows you to deploy a lightweight cluster that can run on as few as three to four physical nodes with 32 GB of RAM each for production high availability deployments.
The OS at the core: determinism, hardware acceleration, and immutability
In private 5G deployments, the OS is the foundational layer through which the network stack accesses compute, networking, scheduling, and hardware acceleration capabilities. For latency-sensitive workloads, a real-time kernel such as real-time Ubuntu , which incorporates PREEMPT_RT, can make task execution more predictable by reducing scheduling latency and providing more deterministic response times. High-throughput UPF workloads, meanwhile, can use technologies such as Data Plane Development Kit (DPDK) for efficient userspace packet processing, while Extended Berkeley Packet Filter (eBPF) and Express Data Path (XDP) provide programmable, high-performance processing within the Linux networking stack.
As private 5G architectures increasingly converge radio processing, edge computing, and AI inference, the OS must expose the hardware primitives needed to allow diverse workloads to share infrastructure predictably and securely. Non-Uniform Memory Access (NUMA) awareness, hugepages, CPU affinity and isolation, device passthrough and Single Root Input/Output Virtualization (SR-IOV) can enable network functions and AI workloads to approach bare metal performance while maintaining resource boundaries through the virtualization and container stack.
Where the threat model requires protection from a potentially compromised host or hypervisor, confidential computing technologies can add hardware-assisted isolation for workloads. The OS therefore needs to provide not just hardware abstraction, but the mechanisms through which higher-level platforms can translate application requirements (e.g., latency, throughput, isolation, and locality) into enforceable resource policies.
Security and lifecycle management are equally important at the physically distributed edge. An OS for private 5G should establish a chain of trust from boot through runtime, combining secure boot, hardware-rooted trust, disk encryption, application confinement, and least-privilege controls with transactional software updates and reliable rollback. Ubuntu Core is an example of this security and lifecycle model, with application confinement, full-disk encryption (FDE), and transactional updates designed for devices that may operate remotely for long periods.
For larger private 5G deployments, vulnerability remediation must also minimize operational disruption. Linux Kernel Livepatch can address supported critical and high-severity kernel vulnerabilities without rebooting, reducing maintenance downtime as a result. In addition to this, Ubuntu Pro provides 10 years of security coverage, which can be extended to 15 years with the Legacy add-on. These capabilities are particularly valuable in environments where infrastructure is expected to remain security-maintained, predictable, and supportable for many years.
Edge AI inference in private 5G deployments
Private 5G networks can generate substantial uplink traffic, such as telemetry, video feeds, sensor data, and more. Sending all raw data to a centralized cloud can increase backhaul requirements, latency, and data and security exposure. Localizing AI inference at the edge can enable very low and more predictable end-to-end latency by keeping data close to where it is generated. A local 5G UPF can provide a direct user-plane path into an edge computing environment, allowing applications such as computer vision, defect detection, autonomous mobile robot trajectory planning, or
to process data streams in milliseconds.
In emerging AI-RAN architectures, this convergence can extend to sharing accelerated compute infrastructure between RAN functions and AI workloads. GPUs and other accelerators can potentially support both radio processing and enterprise AI, with spare capacity made available to additional workloads when RAN demand permits. Industry demonstrations have already shown RAN and AI workloads running concurrently on shared GPU-accelerated platforms.
To integrate AI efficiently, the infrastructure must support containerized workloads seamlessly alongside network functions.Ubuntu Server provides the OS foundation for Private 5G and edge AI, with hardware enablement, security maintenance, and long-term enterprise support. For appliance-style edge deployments, Ubuntu Core offers a more minimal, immutable, and transactional model with secure boot, application confinement, and Over-the-Air (OTA) updates. MicroCloud can add lightweight infrastructure virtualization through LXD containers and VMs, while Canonical Kubernetes provides orchestration for cloud-native 5G Core and AI workloads.
This stack enables enterprises to run private 5G alongside edge AI workloads such as computer vision and robotics, while maintaining the performance, security, isolation, and lifecycle management required for industrial environments.
Conclusion
Private 5G can become more than a dedicated connectivity layer: it can provide the connectivity foundation for distributed vertical computing and AI. The strongest architectures will combine trusted OS foundations, efficient infrastructure virtualization, and cloud-native orchestration, so that compute resources can support both network functions and emerging workloads such as computer vision, robotics, and industrial AI. The objective should be to create an infrastructure platform that can evolve as radio, networking, compute, and AI requirements change, while retaining consistent security and lifecycle management across the estate.
Next steps
Learn how Canonical solutions provide a stable, validated, and open foundation for telco workloads.
- AI-Powered Edge Networking with Dell, Intel, and Canonical
- Deploy the next-generation 5G edge with Canonical
- Canonical's telco infrastructure for virtual RAN
- Get in touch with Canonical's telco team
As private 5G evolves from experimentation into production readiness, its success hinges on a fundamental architectural shift: replacing heavyweight, legacy virtualization stacks with agile, softwarized infrastructure that reduces operational expenditure (OpEx) and accelerates service delivery.
Categories: 5G private network architecture, Private 5G networks
Source: https://ubuntu.com//blog/creating-a-private-5g-network Sep 28, 2026, 05:13 PM
#2
Ubuntu News / Give Linux Mint a makeover wi...
Last post by tim - Sep 28, 2026, 02:31 AMGive Linux Mint a makeover with Silent Horizon
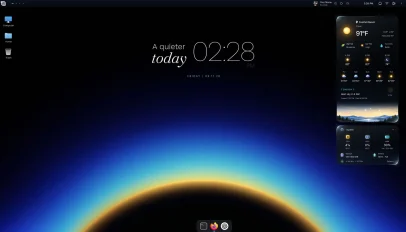 People often say Linux Mint looks dated, but the Cinnamon desktop is highly customisable – something a new transformation pack shows to eye-catching effect. Silent Horizon is a Linux Mint makeover pack made up of desklets, panel applets, wallpaper, Plank dock theme and minor Cinnamon layout tweaks. The work of ~PersianVibeCoder, it aims to create a "calm, minimal desktop with little details that make it feel alive". It has little "details" that do add to the dynamism – albeit at the cost of performance on lower spec devices (as I'll come to in a moment). Take the weather and system [...]
You're reading Give Linux Mint a makeover with Silent Horizon , a blog post from OMG! Ubuntu . Do not reproduce elsewhere without permission.
Categories: News
Source: https://www.omgubuntu.co.uk/2026/09/linux-mint-silent-horizon-design Sep 28, 2026, 01:56 AM
People often say Linux Mint looks dated, but the Cinnamon desktop is highly customisable – something a new transformation pack shows to eye-catching effect. Silent Horizon is a Linux Mint makeover pack made up of desklets, panel applets, wallpaper, Plank dock theme and minor Cinnamon layout tweaks. The work of ~PersianVibeCoder, it aims to create a "calm, minimal desktop with little details that make it feel alive". It has little "details" that do add to the dynamism – albeit at the cost of performance on lower spec devices (as I'll come to in a moment). Take the weather and system [...]You're reading Give Linux Mint a makeover with Silent Horizon , a blog post from OMG! Ubuntu . Do not reproduce elsewhere without permission.
Categories: News
Source: https://www.omgubuntu.co.uk/2026/09/linux-mint-silent-horizon-design Sep 28, 2026, 01:56 AM
#3
Ubuntu News / Era, the new Rust-based calen...
Last post by tim - Sep 26, 2026, 06:23 AMEra, the new Rust-based calendar for GNOME, is now in beta
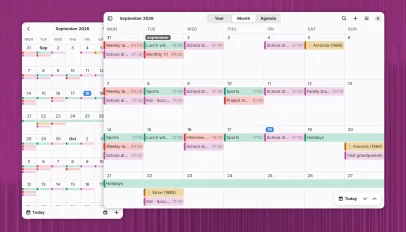 Era is a new Rust-based calendar app for GNOME that describes itself as "beautiful and performant". And you don't need to schedule a date to try it; a beta release is available to install from Flathub. At first glance, Era looks like GNOME's Calendar (which got a big update in the GNOME 51, notably in ways you feel rather than see). But then, how could it not? There are only so many ways to arrange a grid of numbers in boxes with room for coloured event labels. Functionally, Era covers the same ground: you can browse dates, add, edit and [...]
You're reading Era, the new Rust-based calendar for GNOME, is now in beta , a blog post from OMG! Ubuntu . Do not reproduce elsewhere without permission.
Categories: News, calendar, era, rust
Source: https://www.omgubuntu.co.uk/2026/09/era-rust-calendar-gnome-beta Sep 26, 2026, 06:04 AM
Era is a new Rust-based calendar app for GNOME that describes itself as "beautiful and performant". And you don't need to schedule a date to try it; a beta release is available to install from Flathub. At first glance, Era looks like GNOME's Calendar (which got a big update in the GNOME 51, notably in ways you feel rather than see). But then, how could it not? There are only so many ways to arrange a grid of numbers in boxes with room for coloured event labels. Functionally, Era covers the same ground: you can browse dates, add, edit and [...]You're reading Era, the new Rust-based calendar for GNOME, is now in beta , a blog post from OMG! Ubuntu . Do not reproduce elsewhere without permission.
Categories: News, calendar, era, rust
Source: https://www.omgubuntu.co.uk/2026/09/era-rust-calendar-gnome-beta Sep 26, 2026, 06:04 AM
#4
Ubuntu News / Banshee music player is back ...
Last post by tim - Sep 25, 2026, 08:25 PMBanshee music player is back from the dead (well, kinda)
 A revived Banshee music player is now available on the Snap store, making it possible to use it on modern Linux desktops decades after its last stable release. The snap, packaged by Alan Pope, means users can now run Banshee 2.6.2, the final stable release from 2014, on modern Linux desktops. It includes 'compatibility fixes and restores selected online services', but warns not all 'historical' services may work. More of 'reanimated corpse' than reincarnation; the Banshee snap exists as act of software preservation. Container formats like Snap are great for "time capsule" efforts since ancient dependencies can be bundled inside [...]
You're reading Banshee music player is back from the dead (well, kinda) , a blog post from OMG! Ubuntu . Do not reproduce elsewhere without permission.
Categories: News, Banshee, mono, nostalgia, Snap Apps
Source: https://www.omgubuntu.co.uk/2026/09/banshee-music-player-snap-ubuntu Sep 25, 2026, 06:53 PM
A revived Banshee music player is now available on the Snap store, making it possible to use it on modern Linux desktops decades after its last stable release. The snap, packaged by Alan Pope, means users can now run Banshee 2.6.2, the final stable release from 2014, on modern Linux desktops. It includes 'compatibility fixes and restores selected online services', but warns not all 'historical' services may work. More of 'reanimated corpse' than reincarnation; the Banshee snap exists as act of software preservation. Container formats like Snap are great for "time capsule" efforts since ancient dependencies can be bundled inside [...]You're reading Banshee music player is back from the dead (well, kinda) , a blog post from OMG! Ubuntu . Do not reproduce elsewhere without permission.
Categories: News, Banshee, mono, nostalgia, Snap Apps
Source: https://www.omgubuntu.co.uk/2026/09/banshee-music-player-snap-ubuntu Sep 25, 2026, 06:53 PM
#5
Ubuntu News / Ubuntu 26.10 adds a Windows-s...
Last post by tim - Sep 25, 2026, 02:31 AMUbuntu 26.10 adds a Windows-style window snapping panel
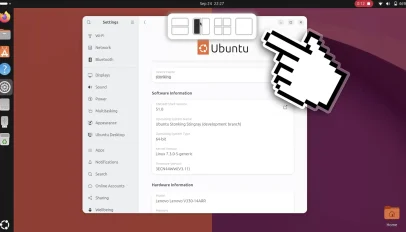 Ubuntu 26.10 offers a new way to tile your apps, with a layout picker sliding in from the top of the screen when you move a window. This "dropzone" concept for quick tiling will be familiar to users of Windows 11 users or those who've tried the Tiling Shell extension for GNOME Shell – they do, broadly, the same thing. When you drag a window a layout picker with a small set of preset layouts drop zones moves in from the top of the display. You drag your window up over a layout zone (a 'ghost' preview of where the [...]
You're reading Ubuntu 26.10 adds a Windows-style window snapping panel , a blog post from OMG! Ubuntu . Do not reproduce elsewhere without permission.
Categories: News, GNOME Extensions, tiling, Ubuntu 26.10
Source: https://www.omgubuntu.co.uk/2026/09/ubuntu-2610-tiling Sep 25, 2026, 01:01 AM
Ubuntu 26.10 offers a new way to tile your apps, with a layout picker sliding in from the top of the screen when you move a window. This "dropzone" concept for quick tiling will be familiar to users of Windows 11 users or those who've tried the Tiling Shell extension for GNOME Shell – they do, broadly, the same thing. When you drag a window a layout picker with a small set of preset layouts drop zones moves in from the top of the display. You drag your window up over a layout zone (a 'ghost' preview of where the [...]You're reading Ubuntu 26.10 adds a Windows-style window snapping panel , a blog post from OMG! Ubuntu . Do not reproduce elsewhere without permission.
Categories: News, GNOME Extensions, tiling, Ubuntu 26.10
Source: https://www.omgubuntu.co.uk/2026/09/ubuntu-2610-tiling Sep 25, 2026, 01:01 AM
#6
Ubuntu News / Want to try Ubuntu’s AI dicta...
Last post by tim - Sep 24, 2026, 08:26 AMWant to try Ubuntu's AI dictation feature? Here's how
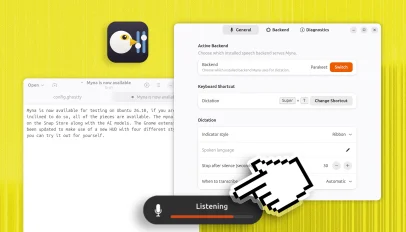 Ubuntu's new AI-powered dictation tool Myna isn't officially ready, but you can give it an early test. Canonical has added the Myna orchestrator snap and a pair of speech-recognition AI models to the Snap Store recently, and made its new desktop Myna Settings tool available to test from a PPA. Ubuntu 26.10 also comes with another component preinstalled, as the gnome-shell-ubuntu-extensions package has a GNOME Shell extension that triggers an on-screen HUD when the Myna local AI speech-to-text tech is listening or transcribing. While a formal call for testing hasn't been made, all the pieces needed to test Myna are [...]
You're reading Want to try Ubuntu's AI dictation feature? Here's how , a blog post from OMG! Ubuntu . Do not reproduce elsewhere without permission.
Categories: News
Source: https://www.omgubuntu.co.uk/2026/09/ubuntu-myna-ai-install Sep 24, 2026, 06:34 AM
Ubuntu's new AI-powered dictation tool Myna isn't officially ready, but you can give it an early test. Canonical has added the Myna orchestrator snap and a pair of speech-recognition AI models to the Snap Store recently, and made its new desktop Myna Settings tool available to test from a PPA. Ubuntu 26.10 also comes with another component preinstalled, as the gnome-shell-ubuntu-extensions package has a GNOME Shell extension that triggers an on-screen HUD when the Myna local AI speech-to-text tech is listening or transcribing. While a formal call for testing hasn't been made, all the pieces needed to test Myna are [...]You're reading Want to try Ubuntu's AI dictation feature? Here's how , a blog post from OMG! Ubuntu . Do not reproduce elsewhere without permission.
Categories: News
Source: https://www.omgubuntu.co.uk/2026/09/ubuntu-myna-ai-install Sep 24, 2026, 06:34 AM
#7
Ubuntu News / Ubuntu speeds up kernel secur...
Last post by tim - Sep 24, 2026, 04:25 AMUbuntu speeds up kernel security updates because of AI
 Your Ubuntu kernel updates are about to get more frequent, as Canonical tries to keep pace with the 'explosion' of security vulnerabilities being found with the help of AI. The company has announced it's adopting a 'unified' two-week stable release update (SRU) cycle for kernel updates. This speeds up patching, testing and getting fixes for CVEs out to users. Previously, Canonical maintained kernel updates on a 4/2 schedule – a four-week regular cycle and a two-week security cycle. The new cadence takes effect from 28 September, 2026. Why a change is needed Canonical says the "explosion" in bugs and CVEs, [...]
You're reading Ubuntu speeds up kernel security updates because of AI , a blog post from OMG! Ubuntu . Do not reproduce elsewhere without permission.
Categories: News, AI/ML, Canonical, kernel, security
Source: https://www.omgubuntu.co.uk/2026/09/ubuntu-kernel-security-updates-faster Sep 24, 2026, 04:01 AM
Your Ubuntu kernel updates are about to get more frequent, as Canonical tries to keep pace with the 'explosion' of security vulnerabilities being found with the help of AI. The company has announced it's adopting a 'unified' two-week stable release update (SRU) cycle for kernel updates. This speeds up patching, testing and getting fixes for CVEs out to users. Previously, Canonical maintained kernel updates on a 4/2 schedule – a four-week regular cycle and a two-week security cycle. The new cadence takes effect from 28 September, 2026. Why a change is needed Canonical says the "explosion" in bugs and CVEs, [...]You're reading Ubuntu speeds up kernel security updates because of AI , a blog post from OMG! Ubuntu . Do not reproduce elsewhere without permission.
Categories: News, AI/ML, Canonical, kernel, security
Source: https://www.omgubuntu.co.uk/2026/09/ubuntu-kernel-security-updates-faster Sep 24, 2026, 04:01 AM
#8
Ubuntu News / Ex-Microsoft dev builds a new...
Last post by tim - Sep 24, 2026, 02:31 AMEx-Microsoft dev builds a new task manager for Linux
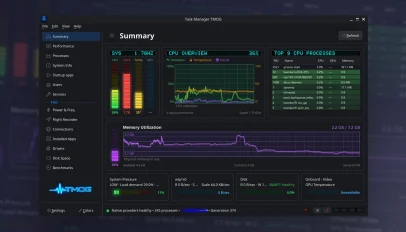 TMOG is a cross-platform task manager for Windows, macOS and Linux created by ex-Microsoft developer Dave Plummer, who created Windows' first one.
You're reading Ex-Microsoft dev builds a new task manager for Linux , a blog post from OMG! Ubuntu . Do not reproduce elsewhere without permission.
Categories: News, AI coded apps, Microsoft, System Tools
Source: https://www.omgubuntu.co.uk/2026/09/tmog-task-manager-linux-beta Sep 24, 2026, 12:56 AM
TMOG is a cross-platform task manager for Windows, macOS and Linux created by ex-Microsoft developer Dave Plummer, who created Windows' first one.You're reading Ex-Microsoft dev builds a new task manager for Linux , a blog post from OMG! Ubuntu . Do not reproduce elsewhere without permission.
Categories: News, AI coded apps, Microsoft, System Tools
Source: https://www.omgubuntu.co.uk/2026/09/tmog-task-manager-linux-beta Sep 24, 2026, 12:56 AM
#9
Ubuntu Blog / Fine tune your own custom LLM...
Last post by tim - Sep 23, 2026, 06:26 PMFine tune your own custom LLM with Canonical Charmed Kubeflow and Feast
So you want your own pet LLM huh?
Knowing where to start can be quite tricky, so luckily for you I've put together this end-to-end guide. It'll get you not just started; you'll end with a fully working chatbot that you've fine tuned on the dataset `nampdn-ai/tiny-webtext`, which is a training dataset designed to improve models' critical thinking abilities. Buckle up, this is going to be both fun and deep.
We're going to do everything using Canonical's Charmed Kubeflow – an enterprise MLOps platform equipped for end-to-end model fine-tuning within a sovereign setup. You can deploy it on a high-performance laptop or a homelab running Kubernetes. If you're planning to do this at scale, you can even run it in a full-on, data center-scale AI factory with many nodes, GPU accelerators, and ultra high-performance network fabric. Check out the Charmed Kubeflow product page on canonical.com or sign up for the managed service, which runs Charmed Kubeflow in your own Microsoft Azure tenancy with the backing of around the clock operational management from Canonical.
All the files you'll need can be found in my GitHub repo , but let's check your system specs first. For this project you will need:
Sounds good? Cool. Let's bring up the system.
Open up your terminal and make sure you've got the base software installed. Run the following commands:
sudo snap install microk8s --channel 1.34-strict/stable
sudo microk8s enable storage dns
sudo microk8s enable metallb 10.64.140.43-10.64.140.49
sudo snap install juju --channel 3.6/stable
sudo microk8s.config | juju add-k8s my-k8s --client
juju bootstrap my-k8s
sudo snap install terraform
sudo apt install git -y
git clone https://github.com/canonical/charmed-kubeflow-solutions.git
pushd charmed-kubeflow-solutions
git checkout track/1.11-rc
pushd terraform/products/kubeflow
Ok, awesome. That got you set up with a one-node, super-compact Kubernetes cluster running Canonical's MicroK8s , with Canonical's operations management engine Juju , and with Terraform.
Now let's launch Charmed Kubeflow. We're going to enable the Kubeflow base system, Kubeflow Trainer v2, KServe model server, and Feast. We'll disable all the other modules like Katib, MLFlow, TensorBoard, federated login and the Canonical Observability Stack. You can always enable them if you want.
DEX_USERNAME=username
DEX_PASSWORD=password
terraform init
terraform apply -auto-approve -var dex_static_username="${DEX_USERNAME}" -var dex_static_password="${DEX_PASSWORD}" -var enable_feast=true -var enable_katib=false -var enable_kserve=true -var enable_training_v2=true -var enable_training_v1=false -var enable_observability=false -var enable_tensorboard=false
popd
popd
Once the Terraform plan completes, it might still take a good 10 minutes for things to come up on the Kubernetes cluster. You can monitor how close to ready things are getting with the command `juju status`. When everything is saying "available", you're gold and you can try to log into Kubeflow.
Open a new tab in your browser and set the address to http://10.64.140.43 . You should see a login screen. Here you can enter the username and password that you set earlier in the variables `DEX_USERNAME` and `DEX_PASSWORD`. Once you're in, step through the setup wizard and you should see the Kubeflow Dashboard screen.
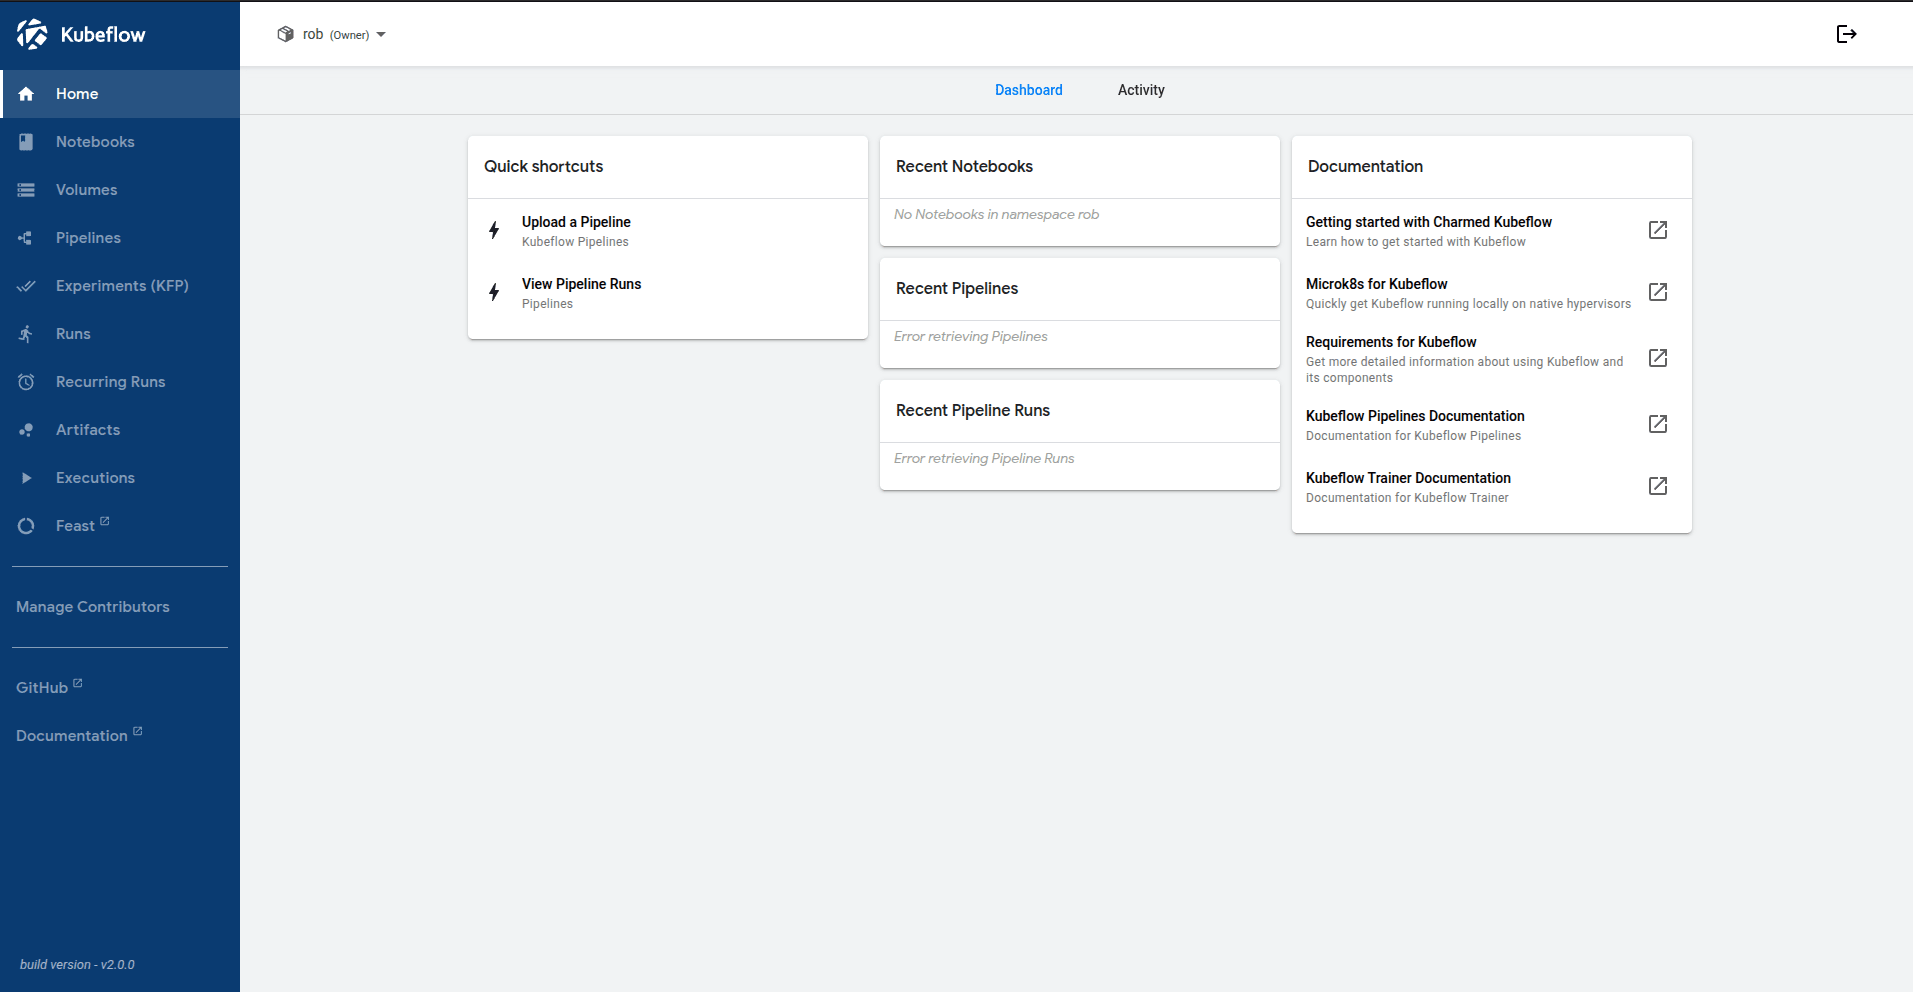
Now, go to Notebooks in the left menu, and launch a new Jupyter Notebook. Make sure you give the notebook a maximum of at least 3 CPU cores and 6GB of RAM, because it's going to do quite a bit of work here. Also, very important, there's an "advanced options" setting, expand that, and then in configurations, make sure to check both "allow access to Kubeflow Pipelines" and "allow access to Feast" before you click the launch button. This will inject all the necessary information into your Jupyter Notebook to be able to access these services as files or environment variables.
Once your notebook is available, you'll see a green tick icon next to it on the list of notebooks in the dashboard and the "connect" button becomes active. Push connect and you should see a new tab open in your browser, with your notebook server in it. In the Launcher, launch a new terminal session. We're going to run some commands.
But first, let's get familiar with the model training architecture we're going to use to fine-tune that LLM.
Architecture overview
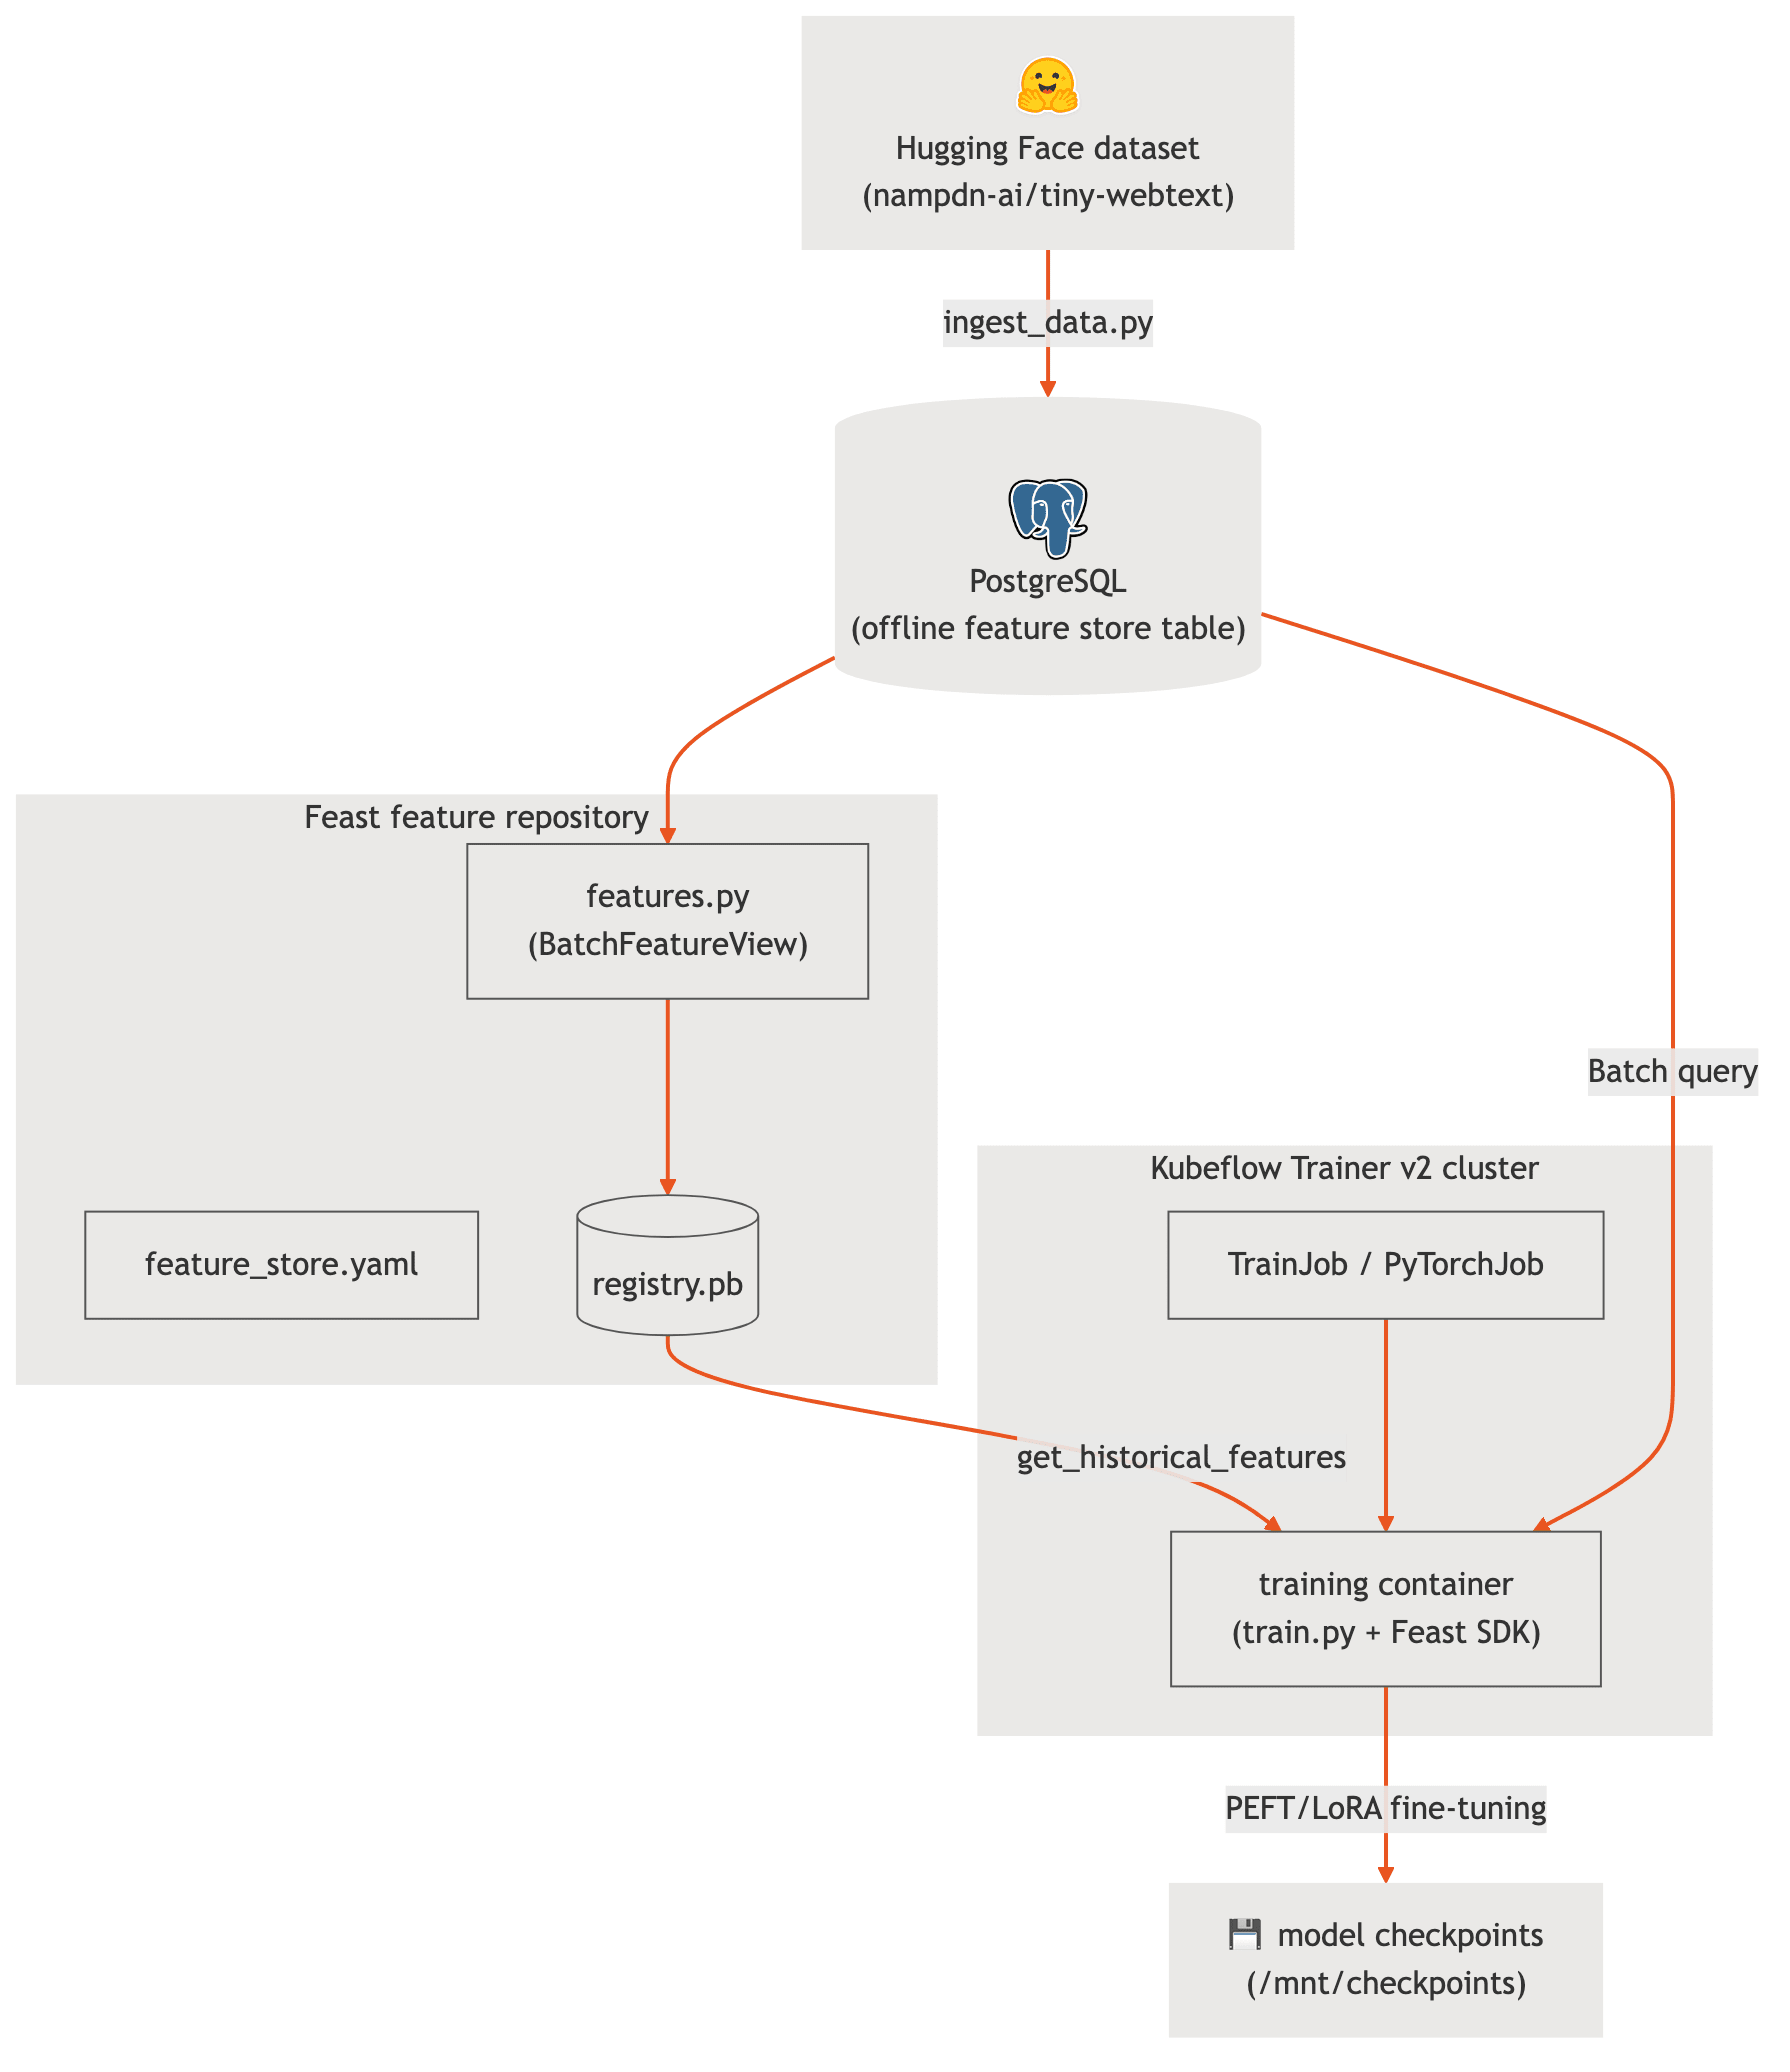
As you can see from the diagram, we're going to pull a dataset from Hugging Face, load it into a Postgres database, register it as a reusable, offline feature store in Feast, and then run a training job using the Kubeflow Trainer v2. We're going to persist the model checkpoints to a Kubernetes Persistent Volume, and then later, we'll run that up on KServe so we can chat to our new, custom LLM.
Project files
The table below lists all the project files. You'll find them all in the GitHub repo that accompanies this article.
FileDescriptionfeatures.pyFeast Entity and `BatchFeatureView` schema definitionsingest_data.pyIngestion script downloading HF dataset into PostgreSQLtrain.pyTraining script consuming Feast features & fine-tuning with HF LoRAtrain_job_no_registry.pyKubeflow Trainer v2 `TrainJob` Kubernetes custom resourcerequirements.txtPython package dependenciestrain_distributed.pyTraining script consuming Feast features & fine-tuning with HF LoRA – distributed multi-node flavourcreate_pvc.yamlCreates a persistent volume to store the model checkpoints, so you don't lose your work when training completes
Grab all the files from the GitHub repo by running the following command in your Jupyter Notebook terminal session:
git clone https://github.com/grobbie/fine-tune-your-own-custom-llm-with-canonical-charmed-kubeflow-and-feast.git
Ingest the dataset into the feature store
Since we chose to deploy the Feast feature store module when we originally set Charmed Kubeflow up, there's not really that much to configure. You'll need the database credentials for the Postgres `offline_store` database, which you'll find in the file `/feast/feature_store.yaml` on your Jupyter Notebook instance. Got those? Great. In your Jupyter Notebook terminal session, type in the following environment variables, making sure to replace the values "your_user" and "your_password" with the right ones for your Postgres offline feature store.
export POSTGRES_HOST="postgres.default.svc.cluster.local"
export POSTGRES_PORT="5432"
export POSTGRES_DB="offline_store"
export POSTGRES_USER="your_user"
export POSTGRES_PASSWORD="your_password"
There are some dependencies we need that are missing from the standard Jupyter Notebook image. Let's fix that. Run these commands in your Jupyter Notebook terminal session:
conda install gcc gxx_linux-64
mv fine-tune-your-own-custom-llm-with-canonical-charmed-kubeflow-and-feast kubeflow-feast-finetune
pushd kubeflow-feast-finetune
pip install -r requirements.txt
popd
You'll need to log into your Hugging Face account now and authorize the session, which you can do by running the following command in your notebook terminal session and following the onscreen instructions.
hf auth login
You might also need to accept the terms of use for the dataset if you didn't already. You'll need to do that at https://huggingface.co/datasets/nampdn-ai/tiny-webtext or you'll get an error when you try to run the ingestion script.
Ok, now run the following command in your notebook terminal session to download the dataset from Hugging Face and load it into your PostgreSQL database.
python kubeflow-feast-finetune/ingest_data.py
Register the features with Feast
The script `features.py` will register the features in Feast. We don't need to run this directly, the `feast` command will pick up the script and run it for us. We just need to copy the Feast YAML configuration file into the directory beforehand. Run the following commands in your notebook terminal session:
pushd kubeflow-feast-finetune
cp /feast/feature_store.yaml .
feast apply
popd
Package the training script
The following commands will create a Kubernetes config map loaded up with all the script and configuration files needed for the training job. Run them in your notebook terminal session, as before:
pushd kubeflow-feast-finetune
python3 -c '
import yaml
cm = {
"apiVersion": "v1",
"kind": "ConfigMap",
"metadata": {"name": "feast-train-code", "namespace": "kubeflow"},
"data": {
"feature_store.yaml": open("feature_store.yaml").read(),
"features.py": open("features.py").read(),
"train.py": open("train.py").read()
}
}
print(yaml.dump(cm))
' | kubectl apply -f -
popd
Create the Kubernetes PersistentVolumeClaim (PVC)
Apply the `create_pvc.yaml` manifest to create a 20GB persistent storage volume in your `kubeflow` namespace. You'll need this later as without it your work will be gone when your training job completes. Run the following command in your notebook terminal session:
cat kubeflow-feast-finetune/create_pvc.yaml | kubectl apply -f -
Submit the fine-tuning job to run on your cluster
The next command will launch a `torch-distributed` training job on the cluster, just using one training instance. Go ahead and run the command in your Jupyter Notebook terminal session.
cat kubeflow-feast-finetune/train_job_no_registry.yaml | kubectl apply -f -
You should see a confirmation message that the training job has been successfully created.
Monitor training
The training job will take a while to complete – maybe an hour or more, depending on your hardware. You can monitor it using the command below. Again, run it in your Jupyter Notebook terminal session:
kubectl logs -f -l batch.kubernetes.io/job-name=feast-tiny-webtext-finetune -n kubeflow -f
The command above will allow you to follow the progress of your training job. When it's finished, you'll see a message in the output something like `Training job completed`. When you see that, you can use Control-C to stop following the log file. The fine-tuned model weights will be saved to your configured persistent volume.
All done. Now to test it out
Model serving with KServe
Let's deploy a KServe model server on Kubernetes pointing to your PVC path, so we can chat to it over an OpenAI-like REST API, like you would do with ChatGPT. The "storage URI" in the following code listing points to the storage volume ("PVC") that we created for the training job, so that the KServe model server can use its output to serve our brand-new fine, fine-tuned LLM. Run the following command in your Jupyter notebook terminal session:
echo "apiVersion: serving.kserve.io/v1beta1
kind: InferenceService
metadata:
name: tiny-webtext-llm
namespace: kubeflow
spec:
predictor:
model:
modelFormat:
name: huggingface
storageUri: "pvc://model-checkpoint-pvc/"
resources:
limits:
cpu: "4"
memory: "8Gi"
requests:
cpu: "2"
memory: "4Gi"
args:
- --model_id=/mnt/models
- --backend=huggingface
- --task=text_generation
" | kubectl apply -f -
You'll need to get the IP of the KServe inference service to be able to chat with your new LLM. To keep things simple, we'll use the internal IP address, and chat from our Jupyter Notebook terminal session. We can use this one-liner command to find that IP address.
KSERVE_IP=$(kubectl get services -n kubeflow | grep tiny-webtext-llm-predictor | grep private | awk '{ print $3 }')
Now that we've got the IP address, we can chat with the custom LLM.
curl -i http://${KSERVE_IP}/openai/v1/chat/completions -H "Content-Type: application/json" -d '{
"model": "tiny-webtext-llm",
"messages": [
{"role": "user", "content": "What is your favorite color?"}
],
"max_tokens": 80,
"temperature": 0.2,
"top_p": 0.9,
"stop": ["\nHuman:", ""]
}'
You should get some kind of answer:
"I love the color of the car. I love the way it looks. I love the way it looks. I love the way it looks. I love the way it looks. I love the way it looks. I love the way it looks. I love the way it looks. I love the way it looks. I love the way it looks. I love the way it looks. I love the way it looks. I love the way it looks. I love the way it looks."
Fair enough, that was a bit of an anticlimax. The model that we've been using as the base model for our fine-tuning – GPT-2 – is a very early model, publicly released in 2019. To get better answers, you can try training a more sophisticated base model, by playing with the `–model-name` parameter sent to `train.py`. For example, you could try the Qwen2.5-0.5B-Instruct model, which is pretty advanced:
python train.py --model-name=Qwen/Qwen2.5-0.5B-Instruct
Asking the same "what is your favorite color?" question to this more sophisticated model yields quite different results:
"The most important thing is to find something that you like and that you feel comfortable with. If you like a certain color, then that's great! If you don't like a certain color, then that's okay too. Just remember to choose something that you feel comfortable with and that you like. This will help you to feel more confident and comfortable in your own skin. Remember, it's okay"
However, just beware – that model might take a lot longer to fine-tune. Using the exact same dataset, it took my system (which has no GPUs) all day when I tried. You can mess with that by tweaking `train_job_no_registry.yaml` – but I'll stop here for now. You've got everything you need to take things further yourself.
So you want your own pet LLM huh? Knowing where to start can be quite tricky, so luckily for you I've put together this end-to-end guide. It'll get you not just started; you'll end with a fully working chatbot that you've fine tuned on the dataset `nampdn-ai/tiny-webtext`, which is a training dataset designed to improve [...]
Categories: AI, Kubeflow, MLOps
Source: https://ubuntu.com//blog/fine-tune-your-own-custom-llm-with-canonical-charmed-kubeflow-and-feast Sep 23, 2026, 06:09 PM
So you want your own pet LLM huh?
Knowing where to start can be quite tricky, so luckily for you I've put together this end-to-end guide. It'll get you not just started; you'll end with a fully working chatbot that you've fine tuned on the dataset `nampdn-ai/tiny-webtext`, which is a training dataset designed to improve models' critical thinking abilities. Buckle up, this is going to be both fun and deep.
We're going to do everything using Canonical's Charmed Kubeflow – an enterprise MLOps platform equipped for end-to-end model fine-tuning within a sovereign setup. You can deploy it on a high-performance laptop or a homelab running Kubernetes. If you're planning to do this at scale, you can even run it in a full-on, data center-scale AI factory with many nodes, GPU accelerators, and ultra high-performance network fabric. Check out the Charmed Kubeflow product page on canonical.com or sign up for the managed service, which runs Charmed Kubeflow in your own Microsoft Azure tenancy with the backing of around the clock operational management from Canonical.
All the files you'll need can be found in my GitHub repo , but let's check your system specs first. For this project you will need:
- One or more computers running Ubuntu 24.04 LTS or later with 32GB RAM and 16 cores, more is better
- A good, stable internet connection to download rather large stuff
- Some familiarity with Linux and Kubernetes – at least, enough to be able to follow along and run the commands.
- An account on Hugging Face so that you can download the dataset we'll be using.
Sounds good? Cool. Let's bring up the system.
Open up your terminal and make sure you've got the base software installed. Run the following commands:
sudo snap install microk8s --channel 1.34-strict/stable
sudo microk8s enable storage dns
sudo microk8s enable metallb 10.64.140.43-10.64.140.49
sudo snap install juju --channel 3.6/stable
sudo microk8s.config | juju add-k8s my-k8s --client
juju bootstrap my-k8s
sudo snap install terraform
sudo apt install git -y
git clone https://github.com/canonical/charmed-kubeflow-solutions.git
pushd charmed-kubeflow-solutions
git checkout track/1.11-rc
pushd terraform/products/kubeflow
Ok, awesome. That got you set up with a one-node, super-compact Kubernetes cluster running Canonical's MicroK8s , with Canonical's operations management engine Juju , and with Terraform.
Now let's launch Charmed Kubeflow. We're going to enable the Kubeflow base system, Kubeflow Trainer v2, KServe model server, and Feast. We'll disable all the other modules like Katib, MLFlow, TensorBoard, federated login and the Canonical Observability Stack. You can always enable them if you want.
DEX_USERNAME=username
DEX_PASSWORD=password
terraform init
terraform apply -auto-approve -var dex_static_username="${DEX_USERNAME}" -var dex_static_password="${DEX_PASSWORD}" -var enable_feast=true -var enable_katib=false -var enable_kserve=true -var enable_training_v2=true -var enable_training_v1=false -var enable_observability=false -var enable_tensorboard=false
popd
popd
Once the Terraform plan completes, it might still take a good 10 minutes for things to come up on the Kubernetes cluster. You can monitor how close to ready things are getting with the command `juju status`. When everything is saying "available", you're gold and you can try to log into Kubeflow.
Open a new tab in your browser and set the address to http://10.64.140.43 . You should see a login screen. Here you can enter the username and password that you set earlier in the variables `DEX_USERNAME` and `DEX_PASSWORD`. Once you're in, step through the setup wizard and you should see the Kubeflow Dashboard screen.
Now, go to Notebooks in the left menu, and launch a new Jupyter Notebook. Make sure you give the notebook a maximum of at least 3 CPU cores and 6GB of RAM, because it's going to do quite a bit of work here. Also, very important, there's an "advanced options" setting, expand that, and then in configurations, make sure to check both "allow access to Kubeflow Pipelines" and "allow access to Feast" before you click the launch button. This will inject all the necessary information into your Jupyter Notebook to be able to access these services as files or environment variables.
Once your notebook is available, you'll see a green tick icon next to it on the list of notebooks in the dashboard and the "connect" button becomes active. Push connect and you should see a new tab open in your browser, with your notebook server in it. In the Launcher, launch a new terminal session. We're going to run some commands.
But first, let's get familiar with the model training architecture we're going to use to fine-tune that LLM.
Architecture overview
As you can see from the diagram, we're going to pull a dataset from Hugging Face, load it into a Postgres database, register it as a reusable, offline feature store in Feast, and then run a training job using the Kubeflow Trainer v2. We're going to persist the model checkpoints to a Kubernetes Persistent Volume, and then later, we'll run that up on KServe so we can chat to our new, custom LLM.
Project files
The table below lists all the project files. You'll find them all in the GitHub repo that accompanies this article.
FileDescriptionfeatures.pyFeast Entity and `BatchFeatureView` schema definitionsingest_data.pyIngestion script downloading HF dataset into PostgreSQLtrain.pyTraining script consuming Feast features & fine-tuning with HF LoRAtrain_job_no_registry.pyKubeflow Trainer v2 `TrainJob` Kubernetes custom resourcerequirements.txtPython package dependenciestrain_distributed.pyTraining script consuming Feast features & fine-tuning with HF LoRA – distributed multi-node flavourcreate_pvc.yamlCreates a persistent volume to store the model checkpoints, so you don't lose your work when training completes
Grab all the files from the GitHub repo by running the following command in your Jupyter Notebook terminal session:
git clone https://github.com/grobbie/fine-tune-your-own-custom-llm-with-canonical-charmed-kubeflow-and-feast.git
Ingest the dataset into the feature store
Since we chose to deploy the Feast feature store module when we originally set Charmed Kubeflow up, there's not really that much to configure. You'll need the database credentials for the Postgres `offline_store` database, which you'll find in the file `/feast/feature_store.yaml` on your Jupyter Notebook instance. Got those? Great. In your Jupyter Notebook terminal session, type in the following environment variables, making sure to replace the values "your_user" and "your_password" with the right ones for your Postgres offline feature store.
export POSTGRES_HOST="postgres.default.svc.cluster.local"
export POSTGRES_PORT="5432"
export POSTGRES_DB="offline_store"
export POSTGRES_USER="your_user"
export POSTGRES_PASSWORD="your_password"
There are some dependencies we need that are missing from the standard Jupyter Notebook image. Let's fix that. Run these commands in your Jupyter Notebook terminal session:
conda install gcc gxx_linux-64
mv fine-tune-your-own-custom-llm-with-canonical-charmed-kubeflow-and-feast kubeflow-feast-finetune
pushd kubeflow-feast-finetune
pip install -r requirements.txt
popd
You'll need to log into your Hugging Face account now and authorize the session, which you can do by running the following command in your notebook terminal session and following the onscreen instructions.
hf auth login
You might also need to accept the terms of use for the dataset if you didn't already. You'll need to do that at https://huggingface.co/datasets/nampdn-ai/tiny-webtext or you'll get an error when you try to run the ingestion script.
Ok, now run the following command in your notebook terminal session to download the dataset from Hugging Face and load it into your PostgreSQL database.
python kubeflow-feast-finetune/ingest_data.py
Register the features with Feast
The script `features.py` will register the features in Feast. We don't need to run this directly, the `feast` command will pick up the script and run it for us. We just need to copy the Feast YAML configuration file into the directory beforehand. Run the following commands in your notebook terminal session:
pushd kubeflow-feast-finetune
cp /feast/feature_store.yaml .
feast apply
popd
Package the training script
The following commands will create a Kubernetes config map loaded up with all the script and configuration files needed for the training job. Run them in your notebook terminal session, as before:
pushd kubeflow-feast-finetune
python3 -c '
import yaml
cm = {
"apiVersion": "v1",
"kind": "ConfigMap",
"metadata": {"name": "feast-train-code", "namespace": "kubeflow"},
"data": {
"feature_store.yaml": open("feature_store.yaml").read(),
"features.py": open("features.py").read(),
"train.py": open("train.py").read()
}
}
print(yaml.dump(cm))
' | kubectl apply -f -
popd
Create the Kubernetes PersistentVolumeClaim (PVC)
Apply the `create_pvc.yaml` manifest to create a 20GB persistent storage volume in your `kubeflow` namespace. You'll need this later as without it your work will be gone when your training job completes. Run the following command in your notebook terminal session:
cat kubeflow-feast-finetune/create_pvc.yaml | kubectl apply -f -
Submit the fine-tuning job to run on your cluster
The next command will launch a `torch-distributed` training job on the cluster, just using one training instance. Go ahead and run the command in your Jupyter Notebook terminal session.
cat kubeflow-feast-finetune/train_job_no_registry.yaml | kubectl apply -f -
You should see a confirmation message that the training job has been successfully created.
Monitor training
The training job will take a while to complete – maybe an hour or more, depending on your hardware. You can monitor it using the command below. Again, run it in your Jupyter Notebook terminal session:
kubectl logs -f -l batch.kubernetes.io/job-name=feast-tiny-webtext-finetune -n kubeflow -f
The command above will allow you to follow the progress of your training job. When it's finished, you'll see a message in the output something like `Training job completed`. When you see that, you can use Control-C to stop following the log file. The fine-tuned model weights will be saved to your configured persistent volume.
All done. Now to test it out
Model serving with KServe
Let's deploy a KServe model server on Kubernetes pointing to your PVC path, so we can chat to it over an OpenAI-like REST API, like you would do with ChatGPT. The "storage URI" in the following code listing points to the storage volume ("PVC") that we created for the training job, so that the KServe model server can use its output to serve our brand-new fine, fine-tuned LLM. Run the following command in your Jupyter notebook terminal session:
echo "apiVersion: serving.kserve.io/v1beta1
kind: InferenceService
metadata:
name: tiny-webtext-llm
namespace: kubeflow
spec:
predictor:
model:
modelFormat:
name: huggingface
storageUri: "pvc://model-checkpoint-pvc/"
resources:
limits:
cpu: "4"
memory: "8Gi"
requests:
cpu: "2"
memory: "4Gi"
args:
- --model_id=/mnt/models
- --backend=huggingface
- --task=text_generation
" | kubectl apply -f -
You'll need to get the IP of the KServe inference service to be able to chat with your new LLM. To keep things simple, we'll use the internal IP address, and chat from our Jupyter Notebook terminal session. We can use this one-liner command to find that IP address.
KSERVE_IP=$(kubectl get services -n kubeflow | grep tiny-webtext-llm-predictor | grep private | awk '{ print $3 }')
Now that we've got the IP address, we can chat with the custom LLM.
curl -i http://${KSERVE_IP}/openai/v1/chat/completions -H "Content-Type: application/json" -d '{
"model": "tiny-webtext-llm",
"messages": [
{"role": "user", "content": "What is your favorite color?"}
],
"max_tokens": 80,
"temperature": 0.2,
"top_p": 0.9,
"stop": ["\nHuman:", ""]
}'
You should get some kind of answer:
"I love the color of the car. I love the way it looks. I love the way it looks. I love the way it looks. I love the way it looks. I love the way it looks. I love the way it looks. I love the way it looks. I love the way it looks. I love the way it looks. I love the way it looks. I love the way it looks. I love the way it looks. I love the way it looks."
Fair enough, that was a bit of an anticlimax. The model that we've been using as the base model for our fine-tuning – GPT-2 – is a very early model, publicly released in 2019. To get better answers, you can try training a more sophisticated base model, by playing with the `–model-name` parameter sent to `train.py`. For example, you could try the Qwen2.5-0.5B-Instruct model, which is pretty advanced:
python train.py --model-name=Qwen/Qwen2.5-0.5B-Instruct
Asking the same "what is your favorite color?" question to this more sophisticated model yields quite different results:
"The most important thing is to find something that you like and that you feel comfortable with. If you like a certain color, then that's great! If you don't like a certain color, then that's okay too. Just remember to choose something that you feel comfortable with and that you like. This will help you to feel more confident and comfortable in your own skin. Remember, it's okay"
However, just beware – that model might take a lot longer to fine-tune. Using the exact same dataset, it took my system (which has no GPUs) all day when I tried. You can mess with that by tweaking `train_job_no_registry.yaml` – but I'll stop here for now. You've got everything you need to take things further yourself.
- Discover the full capabilities of Charmed Kubeflow
- Deep dive into feature engineering with Feast
- Want us to manage the infrastructure so you can focus on the models? Sign up for Managed Kubeflow on Azure
So you want your own pet LLM huh? Knowing where to start can be quite tricky, so luckily for you I've put together this end-to-end guide. It'll get you not just started; you'll end with a fully working chatbot that you've fine tuned on the dataset `nampdn-ai/tiny-webtext`, which is a training dataset designed to improve [...]
Categories: AI, Kubeflow, MLOps
Source: https://ubuntu.com//blog/fine-tune-your-own-custom-llm-with-canonical-charmed-kubeflow-and-feast Sep 23, 2026, 06:09 PM
#10
Ubuntu Blog / Scaling Android™ development ...
Last post by tim - Sep 23, 2026, 12:25 PMScaling Android™ development without scaling hardware
How shared Android capacity helps engineering teams move beyond fixed device labs
In the first blog of this series, we discussed how programmable Android environments can replace manual device preparation with a repeatable lifecycle. A workflow requests an environment with a predefined configuration, executes the required task, collects the results, and releases the resources once the work is completed.
Automation enables a team to create a single Android environment reliably. The next question is about scaling: how can that same operating model support every developer, test, session, and workflow that needs Android?
Running one Android environment in the cloud is useful. Making Android capacity available on demand, at scale, is where the operating model begins to change.
Fixed hardware, variable demand
Physical device labs grow one device at a time. Each additional phone, development board, display, or hardware bench must be purchased, prepared, connected, maintained, shared, and eventually replaced.
That model can work when demand is small and predictable. Engineering demand, however, rarely is. Consider these common use cases:
The traditional approach leaves teams compromising. They can either provision enough hardware for average demand and accept queues during busy periods. Or they can provision for peak demand and leave equipment idle when activity falls.
This creates a clear mismatch. Dedicated Android devices provide a fixed amount of capacity, while development, testing, and streaming workloads create demand that changes over time.
Target hardware (the real components, such as sensors, peripherals, and GPUs) remains essential for validating the characteristics of the final product. However, the number of phones, development boards, or hardware benches available should not determine how quickly every software activity can move.
From device inventory to requested capacity
Cloud infrastructure handles variable demand by pooling compute resources and allocating them to workloads when required. Those workloads run in containers or virtual machines on shared host infrastructure, depending on their technical requirements.
Android can use the same model through Anbox Cloud. Instead of reserving a particular phone, board, or hardware bench, a workflow requests an Android environment with a defined image, configuration, and resource profile. Anbox Cloud runs that environment as a managed container or virtual machine on the available host infrastructure.
Once the task is complete, the Android instance can be removed and its CPU, memory, storage, and graphics resources returned to the shared pool. That capacity can then serve another developer, test, or session.
Android capacity becomes something workflows request rather than something people reserve. Teams can make more environments available when demand rises without assigning a dedicated Android device to every task.
Scale for the workload
Scaling discussions often begin with one question: how many Android instances can run on one server?
There is no universal answer.
Some environments are constrained primarily by CPU and memory. Others depend on GPU capacity, storage performance, network throughput, startup time, or predictable frame delivery. These differences matter more than the raw instance count.
The more useful question is, how much capacity does this workload require to produce predictable results?
Teams need to measure representative applications and Android images under realistic conditions. They need to understand average concurrency, peak demand, session duration, and which infrastructure resource becomes constrained first. Density matters, but predictability matters more.
To match the execution model to the workload, Anbox Cloud supports both containerized and virtualized Android execution.
Neither execution model is intrinsically better. The appropriate model depends on the workload, while the operational objective remains the same: provide the required Android capacity with predictable behavior.
Scaling teams, not only instances
Shared Android capacity also removes organizational bottlenecks, by making environments centrally managed and remotely accessible.
A development board may be located in one office while the engineer who needs it works in another country. A hardware bench may be assigned to one team even when it remains idle. A device may need to remain in a specific degraded state until another engineer is actually assigned or available to investigate it.
When Android environments are centrally managed and remotely accessible, developers no longer need to know which server hosts an instance or where that infrastructure is located. QA engineers do not need to reserve a particular device days in advance, and support teams can access a reproducible environment instead of waiting for hardware to be prepared or shipped.
The same environment can also support both automated and interactive workflows. A failed test can be recreated for investigation, an instance can be streamed to a browser for visual inspection, and a temporary session can be shared with another team.
Scaling therefore means more than running additional instances. It means giving more people access to the right Android environment when they need it.
Reusable capacity
Shared infrastructure remains efficient only when resources are released after use. Temporary Android instances should be removed once their outputs have been collected, while persistent environments should exist because a workflow explicitly requires them.
For a single environment, this improves reproducibility. At fleet scale, it prevents unused instances from consuming capacity required by active workloads.
From scalable capacity to continuous workflows
Automation makes Android environments programmable. Scaling makes that capacity available to more developers, tests, sessions, and engineering teams. Together, they allow Android capacity to be requested by software rather than reserved by people. Tests can run in parallel instead of waiting for individual devices, while interactive environments can be accessed remotely rather than tied to a particular laboratory.
Dedicated Android devices and target hardware still have an essential role. Teams must ultimately validate sensors, peripherals, drivers, radio interfaces, thermal behavior, performance, and other device-specific characteristics on the final product.
However, those devices can be reserved for work that genuinely depends on their physical characteristics, rather than expecting those same devices to carry every development and validation task. Teams can run early checks in programmable environments, execute broader test matrices in parallel, and reproduce software failures, all without waiting for a particular device.
This creates a more balanced validation model: run early, validate in the cloud, and prove on target hardware.
Once Android capacity can be requested on demand, the next question is what should request those environments and when.
The answer is the development pipeline.
In the next article, we will look at how Android environments can become a standard part of continuous integration and delivery: created automatically for each change, used for validation, and removed when the workflow is complete.
Read Part 1: Android development shouldn't start with a physical device
Learn more about Anbox Cloud or contact our team: https://canonical.com/anbox-cloud
How shared Android capacity helps engineering teams move beyond fixed device labs In the first blog of this series, we discussed how programmable Android environments can replace manual device preparation with a repeatable lifecycle. A workflow requests an environment with a predefined configuration, executes the required task, collects the results, and releases the resources once [...]
Categories: Anbox, anbox cloud, Anbox Cloud Appliance
Source: https://ubuntu.com//blog/scaling-android-development-without-scaling-hardware Sep 23, 2026, 11:37 AM
How shared Android capacity helps engineering teams move beyond fixed device labs
In the first blog of this series, we discussed how programmable Android environments can replace manual device preparation with a repeatable lifecycle. A workflow requests an environment with a predefined configuration, executes the required task, collects the results, and releases the resources once the work is completed.
Automation enables a team to create a single Android environment reliably. The next question is about scaling: how can that same operating model support every developer, test, session, and workflow that needs Android?
Running one Android environment in the cloud is useful. Making Android capacity available on demand, at scale, is where the operating model begins to change.
Fixed hardware, variable demand
Physical device labs grow one device at a time. Each additional phone, development board, display, or hardware bench must be purchased, prepared, connected, maintained, shared, and eventually replaced.
That model can work when demand is small and predictable. Engineering demand, however, rarely is. Consider these common use cases:
- A CI pipeline may need many temporary environments after a code change.
- A QA team may need additional capacity before a release.
- A streaming service may experience a sudden increase in active sessions.
- An automotive team may need to validate several Android Automotive OS configurations in parallel.
The traditional approach leaves teams compromising. They can either provision enough hardware for average demand and accept queues during busy periods. Or they can provision for peak demand and leave equipment idle when activity falls.
This creates a clear mismatch. Dedicated Android devices provide a fixed amount of capacity, while development, testing, and streaming workloads create demand that changes over time.
Target hardware (the real components, such as sensors, peripherals, and GPUs) remains essential for validating the characteristics of the final product. However, the number of phones, development boards, or hardware benches available should not determine how quickly every software activity can move.
From device inventory to requested capacity
Cloud infrastructure handles variable demand by pooling compute resources and allocating them to workloads when required. Those workloads run in containers or virtual machines on shared host infrastructure, depending on their technical requirements.
Android can use the same model through Anbox Cloud. Instead of reserving a particular phone, board, or hardware bench, a workflow requests an Android environment with a defined image, configuration, and resource profile. Anbox Cloud runs that environment as a managed container or virtual machine on the available host infrastructure.
Once the task is complete, the Android instance can be removed and its CPU, memory, storage, and graphics resources returned to the shared pool. That capacity can then serve another developer, test, or session.
Android capacity becomes something workflows request rather than something people reserve. Teams can make more environments available when demand rises without assigning a dedicated Android device to every task.
Scale for the workload
Scaling discussions often begin with one question: how many Android instances can run on one server?
There is no universal answer.
- A streamed Android game does not have the same resource profile as an automated test.
- An interactive development environment creates a different demand pattern from a nightly validation pipeline.
- A complete Android Automotive OS image requires different resources from an application-level workload.
Some environments are constrained primarily by CPU and memory. Others depend on GPU capacity, storage performance, network throughput, startup time, or predictable frame delivery. These differences matter more than the raw instance count.
The more useful question is, how much capacity does this workload require to produce predictable results?
Teams need to measure representative applications and Android images under realistic conditions. They need to understand average concurrency, peak demand, session duration, and which infrastructure resource becomes constrained first. Density matters, but predictability matters more.
To match the execution model to the workload, Anbox Cloud supports both containerized and virtualized Android execution.
- Containers are suited to application-oriented workloads where density, startup time, and efficient resource use matter, including testing, streaming, automation, and gaming.
- Virtual machines are suited to workloads that require a complete Android system with its own kernel and virtual-machine boundary, such as custom Android system development and system-level validation.
Neither execution model is intrinsically better. The appropriate model depends on the workload, while the operational objective remains the same: provide the required Android capacity with predictable behavior.
Scaling teams, not only instances
Shared Android capacity also removes organizational bottlenecks, by making environments centrally managed and remotely accessible.
A development board may be located in one office while the engineer who needs it works in another country. A hardware bench may be assigned to one team even when it remains idle. A device may need to remain in a specific degraded state until another engineer is actually assigned or available to investigate it.
When Android environments are centrally managed and remotely accessible, developers no longer need to know which server hosts an instance or where that infrastructure is located. QA engineers do not need to reserve a particular device days in advance, and support teams can access a reproducible environment instead of waiting for hardware to be prepared or shipped.
The same environment can also support both automated and interactive workflows. A failed test can be recreated for investigation, an instance can be streamed to a browser for visual inspection, and a temporary session can be shared with another team.
Scaling therefore means more than running additional instances. It means giving more people access to the right Android environment when they need it.
Reusable capacity
Shared infrastructure remains efficient only when resources are released after use. Temporary Android instances should be removed once their outputs have been collected, while persistent environments should exist because a workflow explicitly requires them.
For a single environment, this improves reproducibility. At fleet scale, it prevents unused instances from consuming capacity required by active workloads.
From scalable capacity to continuous workflows
Automation makes Android environments programmable. Scaling makes that capacity available to more developers, tests, sessions, and engineering teams. Together, they allow Android capacity to be requested by software rather than reserved by people. Tests can run in parallel instead of waiting for individual devices, while interactive environments can be accessed remotely rather than tied to a particular laboratory.
Dedicated Android devices and target hardware still have an essential role. Teams must ultimately validate sensors, peripherals, drivers, radio interfaces, thermal behavior, performance, and other device-specific characteristics on the final product.
However, those devices can be reserved for work that genuinely depends on their physical characteristics, rather than expecting those same devices to carry every development and validation task. Teams can run early checks in programmable environments, execute broader test matrices in parallel, and reproduce software failures, all without waiting for a particular device.
This creates a more balanced validation model: run early, validate in the cloud, and prove on target hardware.
Once Android capacity can be requested on demand, the next question is what should request those environments and when.
The answer is the development pipeline.
In the next article, we will look at how Android environments can become a standard part of continuous integration and delivery: created automatically for each change, used for validation, and removed when the workflow is complete.
Read Part 1: Android development shouldn't start with a physical device
Learn more about Anbox Cloud or contact our team: https://canonical.com/anbox-cloud
How shared Android capacity helps engineering teams move beyond fixed device labs In the first blog of this series, we discussed how programmable Android environments can replace manual device preparation with a repeatable lifecycle. A workflow requests an environment with a predefined configuration, executes the required task, collects the results, and releases the resources once [...]
Categories: Anbox, anbox cloud, Anbox Cloud Appliance
Source: https://ubuntu.com//blog/scaling-android-development-without-scaling-hardware Sep 23, 2026, 11:37 AM